There’s a huge number of platforms to choose from if you’re looking to build a blog. WordPress is a likely first candidate, as these days it powers over 30% of the entire web, but products like Medium, Blogger, or Wix, to name just a few, are also popular and powerful alternatives.
All of these platforms are similar in what they achieve, but different in what they offer and how they work. Some of them are free, whilst others are paid or place advertising alongside your content; some of them take care of the hosting for you, others require you to run a piece of software in your own infrastructure; some allow you to use a custom domain name, while others charge a fee for that. It feels almost impossible to find a solution that ticks all the boxes.
There’s another alternative that might do just that, and it’s not a name that usually comes to mind when you think of a blogging platform: GitHub. With Pages, any GitHub repository can be turned into a website associated with the easiest development workflow you can imagine. You don’t need to run any software or worry about setting up a server, and there’s no FTP, SSH or anything else getting in the way – you simply push your content to the repository and it goes live automatically.
Since GitHub offers a free tier with support for an unlimited number of repositories, this effectively means that you can host as many websites as you like, for free, with no advertising or setup required. Plus, it allows you to use your own domain name with HTTPS. That doesn’t sound like a bad deal, does it?
¶ Compared to more traditional blogging platforms
Before going any further, it’s important to point out a few key differences between GitHub Pages and the more traditional blogging platforms. Most of these platforms behave as opaque services, offering a set of visual interfaces from where you can manage your content. What happens between that and your site going live is not really under your control, particularly the how and where the content is actually stored. Will you be able to access it if the service suddenly shuts down? How easy is it to extract the content if you decide to migrate it to a different platform?
In that sense, GitHub Pages is a more transparent option. Because it uses the Git protocol, you can easily keep a copy of the repository in your local system, or even set up multiple remote mirrors using different providers (like Bitbucket and GitLab), so you’re not forced to put all eggs in one basket. Also, content is stored in flat files in the format of your choice. There’s no magical interface between you and the content – it’s just there.
However, this also makes GitHub Pages more of a barebones solution. It doesn’t come with a content management system right out of the box (even though you can one), and under the hood it represents a fundamentally different paradigms from the likes of WordPress. Rather than having a system that can dynamically fetch, generate and manipulate content on every request, GitHub Pages only lets you serve static files, which means your pages must be generated in advance.
This paradigm might not be the most obvious choice for certain applications, but a blog site is usually a great fit. Content is not expected to change every few seconds and it’s usually not automatically generated, so it’s perfectly reasonable to build a set of static pages every time you write a new post. Once those pages are generated, you can simply push the files to a repository and they will be live on your GitHub-powered blog within seconds.
¶ Getting started with GitHub Pages
To get started, the first thing you’ll need is a repository. To create one, head to https://github.com/new and you’ll find a screen similar to the one below.
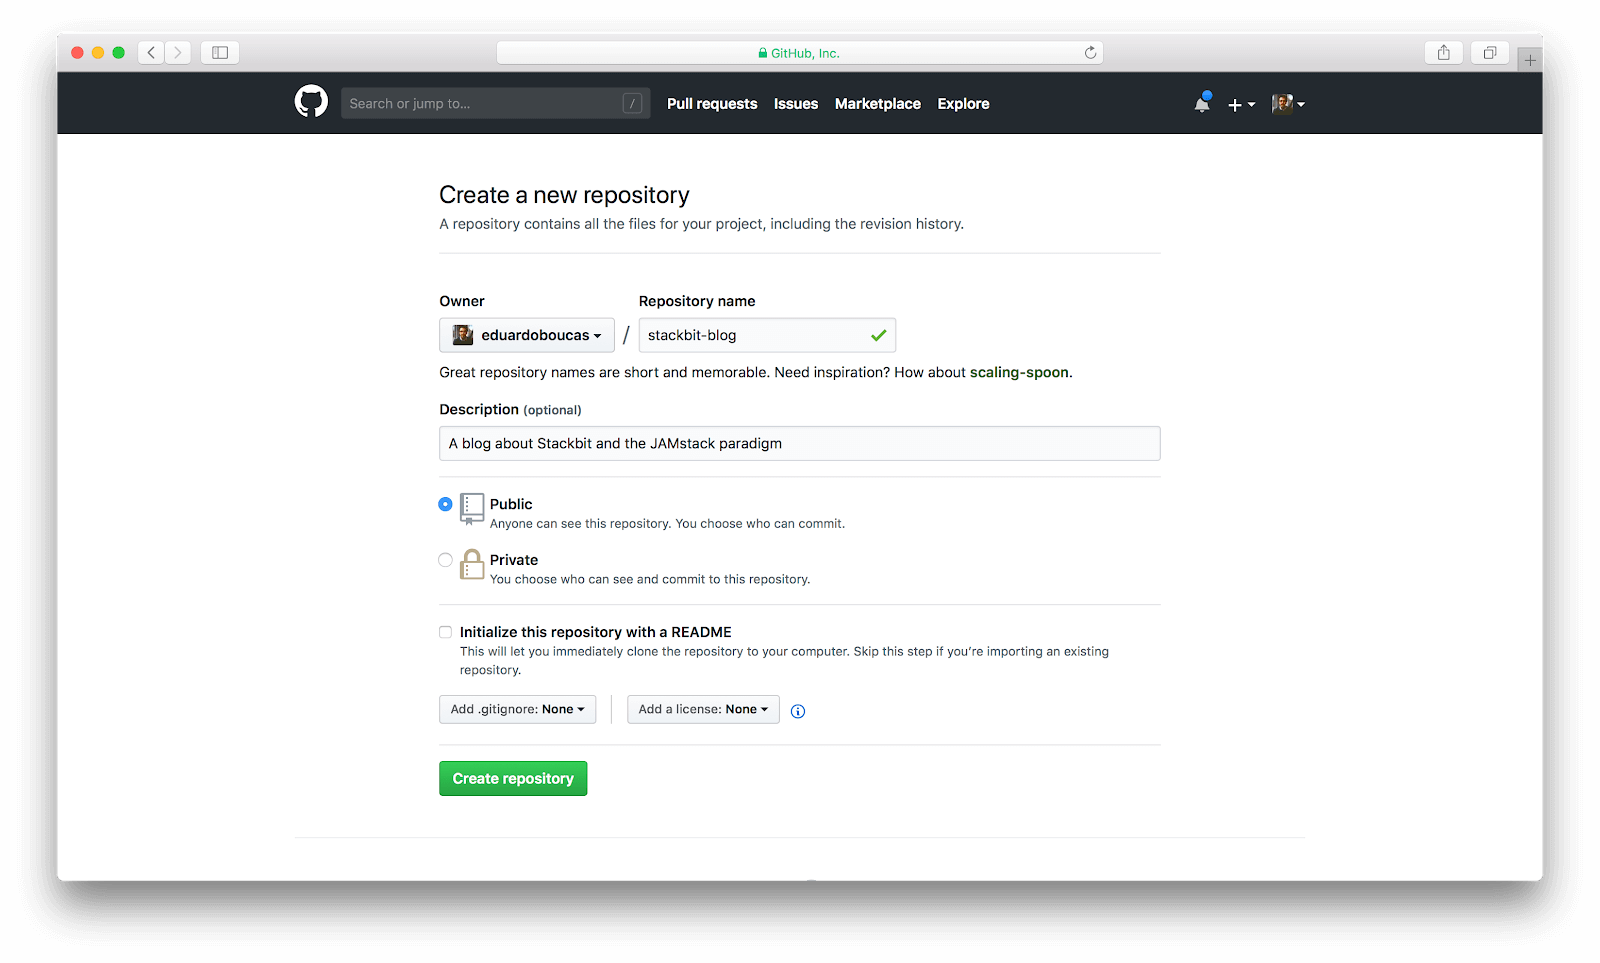
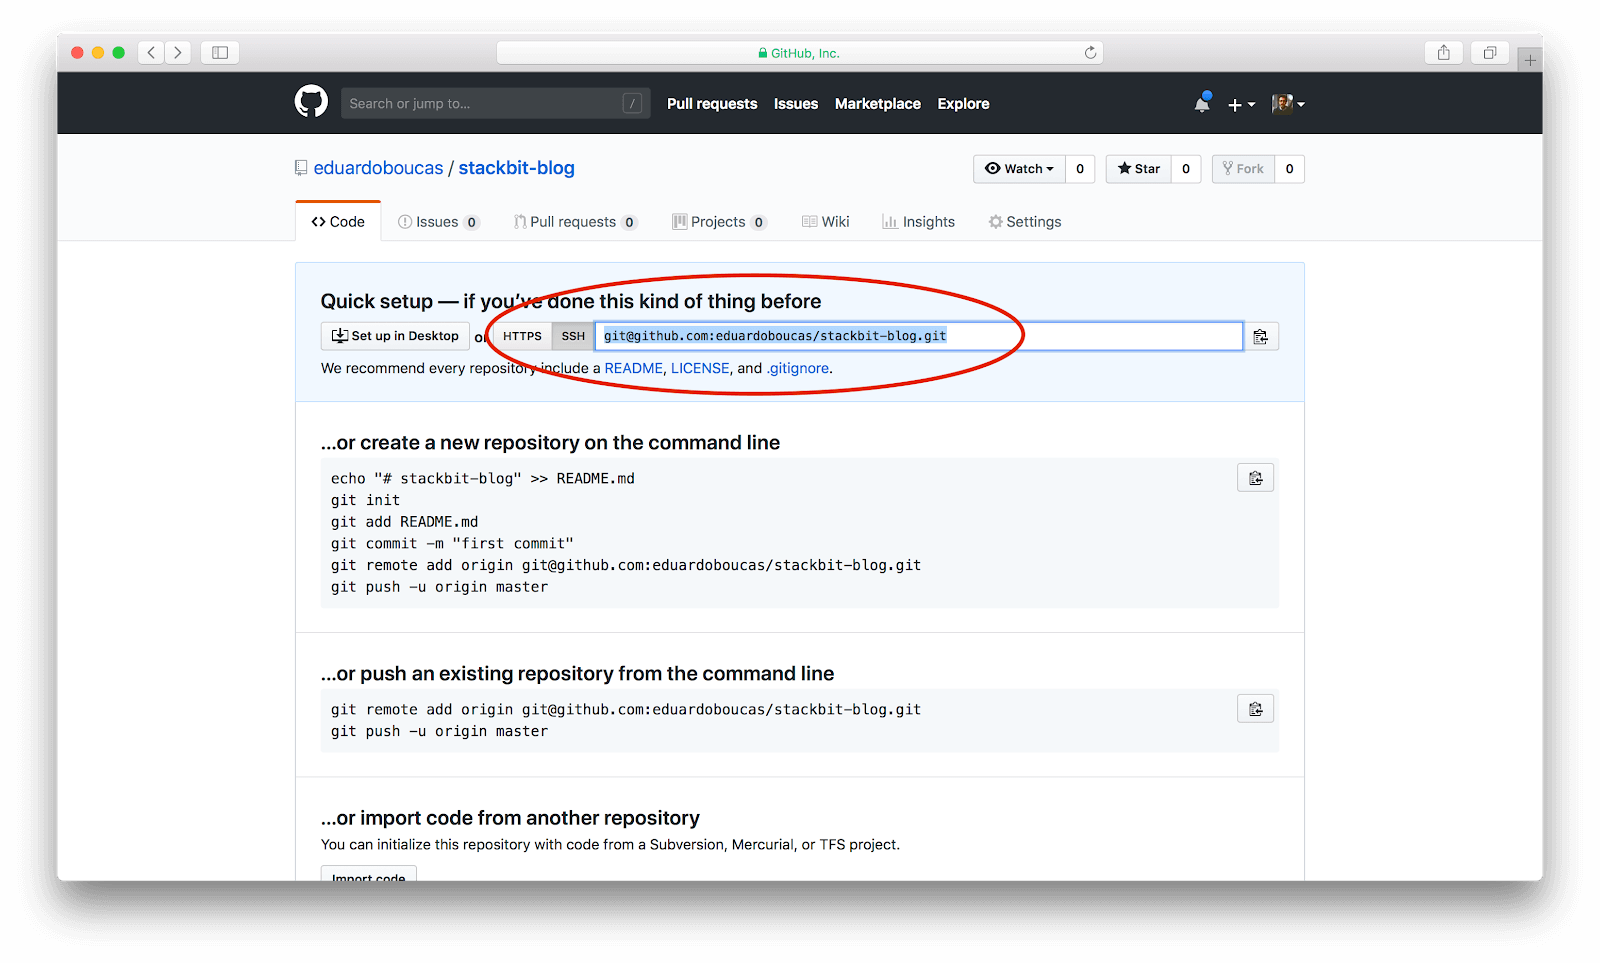
After choosing a name and description for the repository, proceed to Create repository. If all goes well, you should be taken to your new repository page. It’s not terribly interesting at this point, since we haven’t added any content, but it shows the repository address in the box highlighted in red. Make note of that, we’ll use it in a minute.
Next, let’s build our first page. Create a new directory and place a file called index.html inside it, with some simple HTML.
<!DOCTYPE html><html><head> <title>My new blog</title></head><body> <h1>Welcome</h1> <p>This is where it all begins!</p></body></html>Now it’s time to publish. There are various ways in which you can interact with your repository. For this tutorial, we’re going with the plain old terminal, as we’ll use a very short and simple list of commands, but if you’d rather use a graphical interface like GitHub Desktop, that’s perfectly fine too.
Open a terminal window and navigate to the directory in which you saved the file (cd /path/to/your/directory). Once there, type the commands below:
git initgit remote add origin git@github.com:eduardoboucas/stackbit-blog.git (replace this with your repository address)git add index.htmlgit commit -m "Create first page"git push origin masterWhat’s happening here? We’re starting a new Git repository in the directory we’ve created and then linking it to the GitHub repository. Then, we’re adding index.html to the list of files to be published, committing it with a message describing the operation, and finally pushing it to the remote repository.
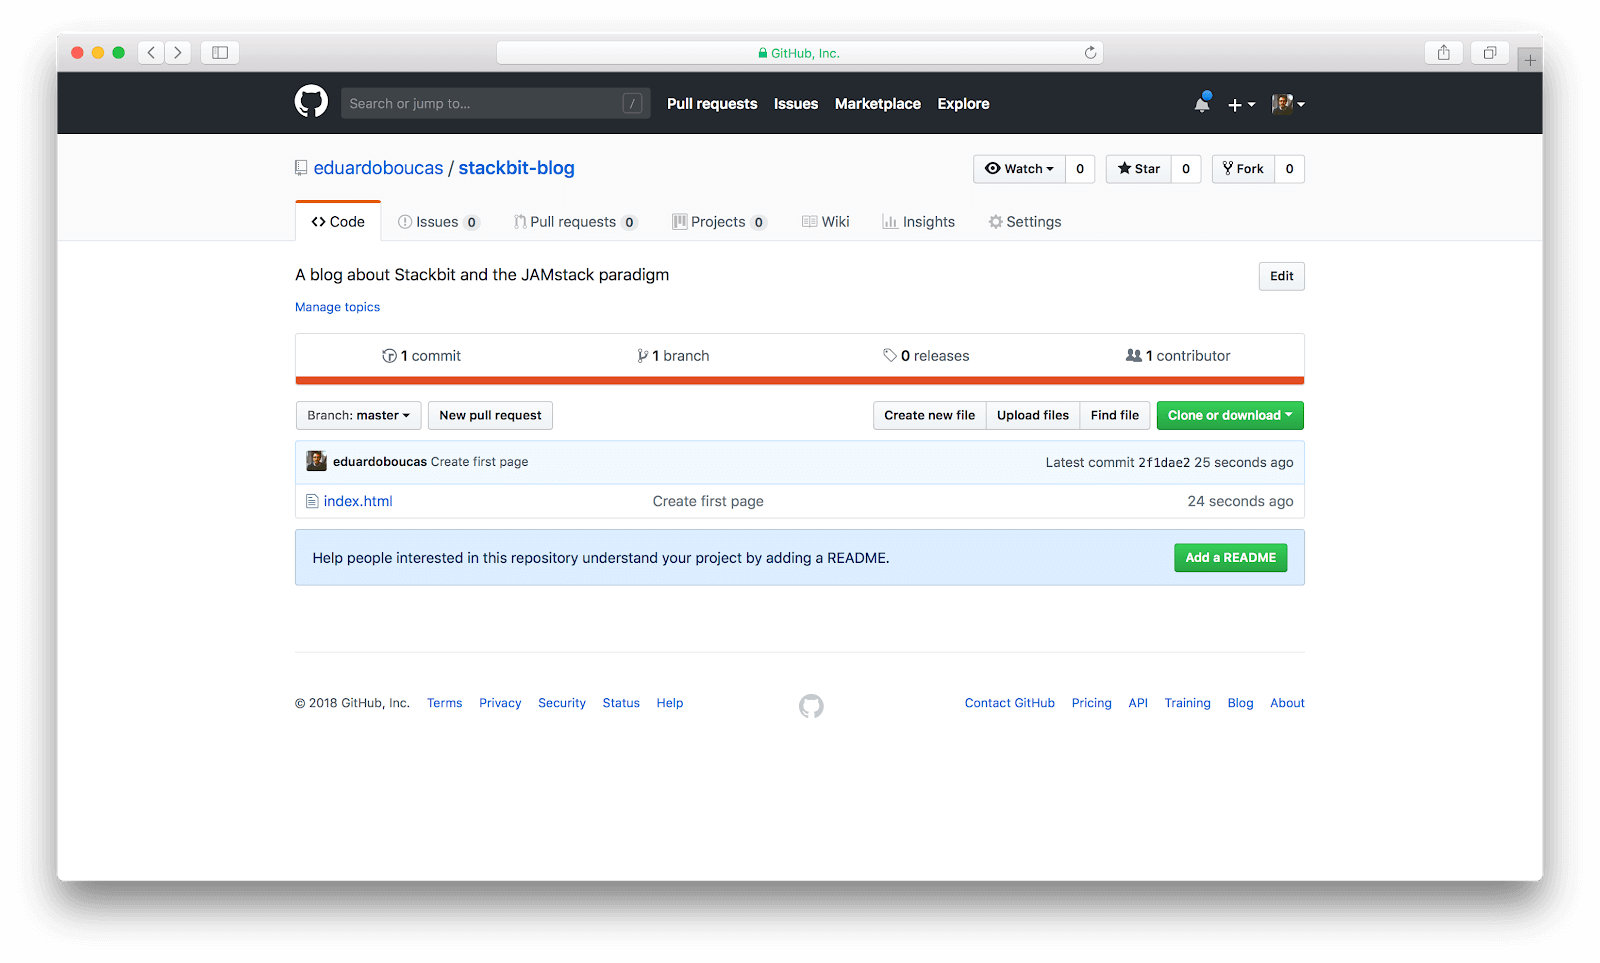
If you refresh your repository page on GitHub, you should now see the file we’ve just uploaded.
Finally, we need to enable GitHub Pages for this repository. On the screen shown above, click on Settings and scroll down to the GitHub Pages section. In the Source selector, select master as the branch to build from and click Save.
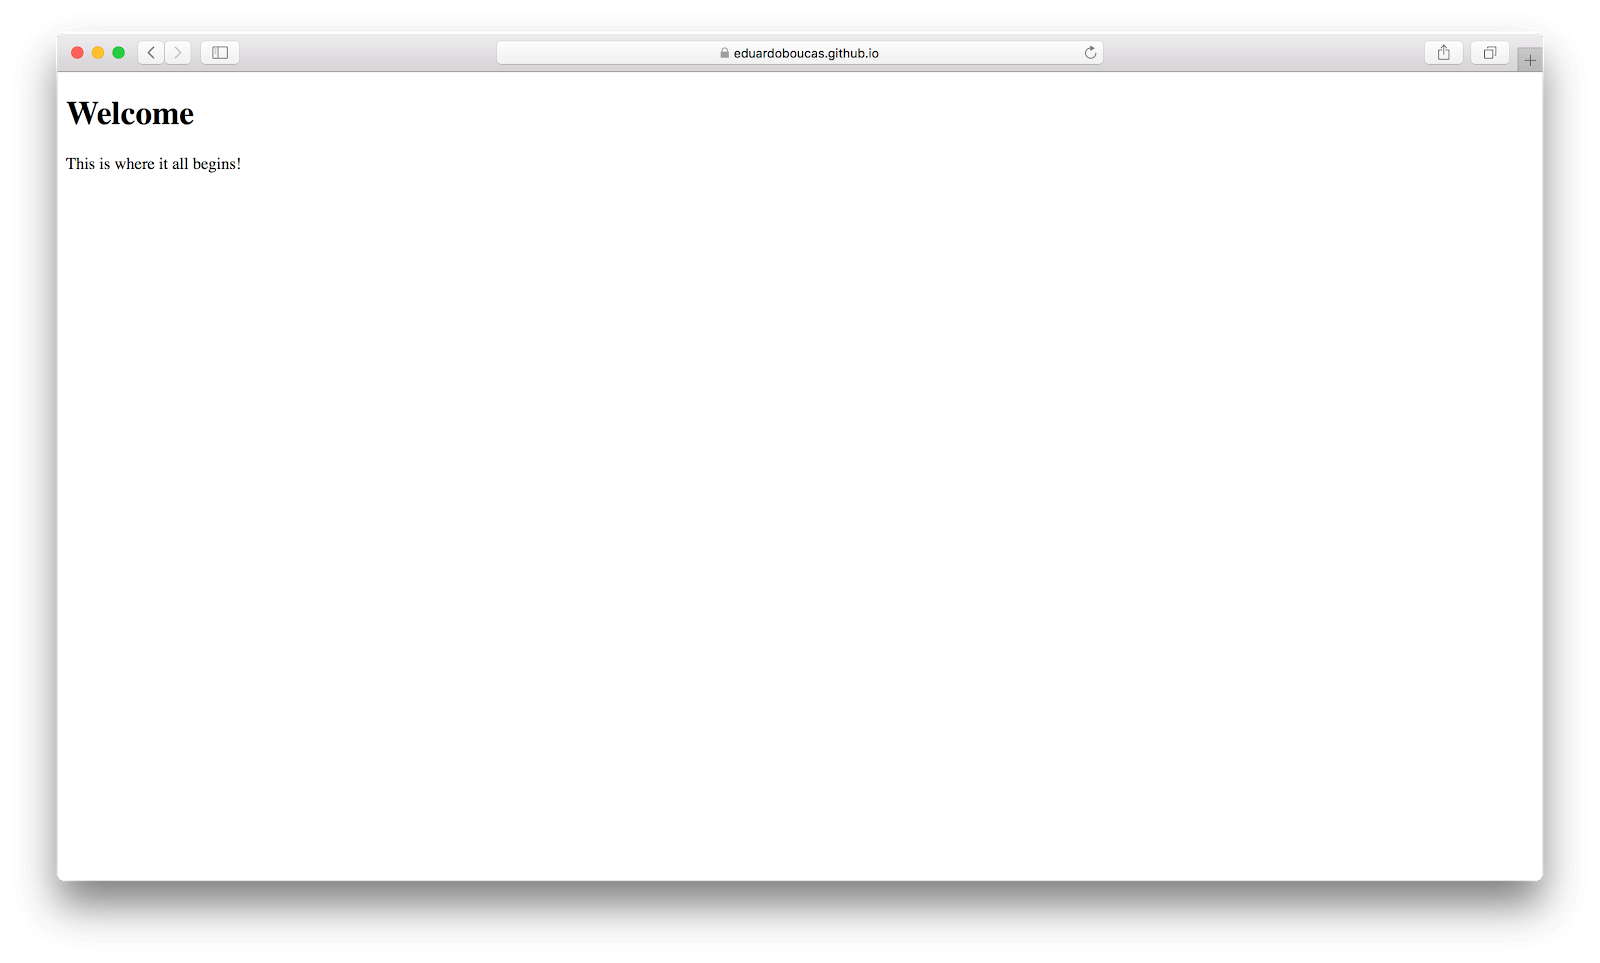
After that, you should see a message confirming that your site is ready to be published and indicating its URL. If you navigate to it, you should be able to see your new website.
¶ Adding Jekyll to the mix
We have managed to create a functional solution, but in reality it’s not a very practical one. Whilst it’s fine to manually generate the HTML pages for this example site, it’s not a sustainable process for a reasonably-sized project.
For example, imagine that we want to create a landing page for our blog where all the posts are listed. For each entry, we want to display the title, an excerpt and a Read more button which, when clicked, takes people to another page where the full post is displayed. This means that creating or updating a post suddenly involves editing two files. Once we add things like pagination and category or tag aggregation pages, that number starts to grow and it becomes unmanageable.
Also, if you wanted to migrate your content to a different platform in the future, or perhaps reuse it across different channels, you’d want it to be in a format and structure that is as raw as possible, decoupled from any implementation or technology. Arguably, storing it in HTML files that are bloated with presentation markup is not the best way to do it.
This is where static site generators come in. A static site generator is a piece of software that takes content in various formats and generates HTML pages with it as per your requirements. This means taking a directory full of blog posts, in a format like Markdown, and generating landing pages, full post pages, pagination, tag and category aggregation pages, search and anything else you can think of. All you need to do is run a command (usually called a build step) and an entire site will be generated automatically for you.
There are hundreds of static site generators to choose from, but in this article we’ll focus on one in particular: Jekyll. The reason for this is that Jekyll has a special status with GitHub Pages. Whereas with any other static site generator you need to run the build step in your machine and push the resulting files to the repository, with Jekyll you can simply push the source files and GitHub Pages will run the build step for you, publishing the resulting files automatically.
To add Jekyll to our blog, first we must delete the index.html file we created previously. Then, install Jekyll and tell it the name of the directory where it should create the site. We should use the directory we’ve created previously, as it’s already linked to the GitHub repository.
gem install bundler jekylljekyll new stackbit-blogTo build the site on your system, run jekyll serve. It will generate all the HTML files and create a URL where the site will be available. Every time you modify a file, the site will be regenerated and the URL will reflect your changes.
If you’re using a github.io URL (e.g. your-username.github.io/your-repository), you must tell Jekyll that the base path is /your-repository instead of the root path. To do this, open the _config.yml file and set the baseurl property to /your-repository (in my case, this was /stackbit-blog).
When you’re ready to push your new Jekyll site live, you can run:
git add .git commit -m “Add Jekyll”git push origin masterIn a few seconds, you’ll be able to refresh your GitHub URL and see your new Jekyll-powered site in action.
¶ Choosing a theme for your Jekyll site
To change the look and feel of your site, you can try different themes. A quick search for “jekyll themes” will lead you to thousands of themes to choose from, with different layouts and styles. When you find one that you like, you can enable it by adding it to the configuration file.
Alternatively, GitHub makes a handful of themes available for you to install via their interface. To try it, go to Settings, scroll down to GitHub Pages and click on Change theme. You’ll see a preview of each theme available, and once you find one that you like, hit Select theme and your site will update accordingly. ∎